Saturday, December 6, 2014

Needle Felted Head....Stage 3


Life Size Needle Felted Head......stage 3
Now I am starting to refine the shape of the head. Flattening the sides and adding more wool to the chin....lengthening the face. Locating where the features will go and measuring and comparing to my model which is my husband. I have started with the nose.
I added more width to the nose and reshaped the nostrils. Sculpting with wool is much like clay. You can add and subtract as you go. You can even use scissors and trim off unwanted wool and needle in new wool.

You have to be conscious of the profile as well since this is 3 dimensional.  Here I have checked the depth of the nose. I think it's pretty close to accurate.
Check back soon. I will probably move on to the eyes and brow line next.  And will probably be adding more wool to the forehead area.....still adding more length to the face.


Thursday, December 4, 2014

Stage 2....Felting a full size head


Life Size Needle Felted Head......stage 2
Now I have needle felted wool batting all over the poly batting  core shape. I am now working on forming the head and getting it to the shape and size it needs to be before moving on to the features. I will also be working on smoothing the surface. I may wet it with soap and water and use wet felting techniques to tighten and smooth the surface.
I included the face below for scale.  The top form is still slightly under full size.
......moving on to stage 3.


Life Size Head Demo....Stage 1


Life Size Needle Felted Head
Well here goes. The beginning stages of my first life size needle felted sculpted head. I decided to use poly batting for my base or core of the head. No use to waste good wool on the inside. I bundled up the poly batting in a ball and put netting around it and secured it with string. Then to form the back of the head I bundled up a smaller ball of batting placed on the first big ball and covered it with netting and hand stitched it together.
After bundling the first large ball I trimmed the netting off close to the tie.
As seen above I placed the smaller bundle of batting over the tie area of the big ball then covered it with netting and hand stitched it down around the edge roughly shaping it while I stitched.
Next I started needle felting wool around the stitched area to fill in and form a better head shape. Now I can continue with the needle felting process. Adding more wool and sculpting. Stay tune for more steps in the process.


Tuesday, December 2, 2014

Needle felted sculptures


Needle Felted Heads
This is my second character head using better skin tone wool and still using exaggerated features. I am progressing with my features being more prominent and defined and adding more detail.
This is my third head sculpture. Here I am moving toward a more realistic face. This is about 4.5x3.5 and the one above is about 3.5x2.5. My goal is to be able to do a life size head once I get comfortable sculpting with a needle.  These faces are just made up from my mind. I hope to be able to sculpt a person I know eventually.

This is still a work in progress. he only has one ear and still needs some refining and detail.


Tuesday, September 30, 2014

Sculpting with Wool


Needle Felted Character
This is my first needle felted character. She is about 15" tall. She was a work in progress. I started with the head with no idea in mind. Did not even know if it was going to be male or female. I just let it evolve.

These photos show the evolution.
 

Monday, July 28, 2014

Wet felted Cuff


Cuff with Locks and Beads
This cuff was wet felted with natural Finn Wool and locks. It is embellished with black beads.
The closure is a decorative button on the backside.

Saturday, July 19, 2014

Wet felted Vessel


Art Nouveau Vessel
The weather has cooled off a bit so I thought I would do an all day project. I already had this idea in my sketch book. I used Zinn Wool which works very well for vessels. On the top layer I added wisps of merino to make a variation of color. I allowed extra length in my resist pattern and three bump outs on the sides to accommodate the three folds. My resist included 3 multiple pieces taped together at the bottom to form the black extensions. They are not handles, just decorative design elements.
The vessel turned out pretty close to my sketch except for the black extensions. They were supposed to be free at the top but in order for them to be free I would or should have put wire in between the layers of wool so they had some strength and support. Instead I hand stitched the top edge of them to the vessel. I crimped them to give them an interesting shape and let them dry.
Detail of folds.


Wednesday, July 16, 2014

Bubble felting technique


Cuff and Brooch
I made a practice piece using wood balls to make bubbles in a piece of wet felting. I can't just let it be a sample. Had to make something out of it. I needle felted the purple rings around the bubbles. Poked the bubbles inward and sewed some beads in the center of each one. Put it around my wrist and decided to make a cuff out of it. I had some left over felted cord that I made into a hook an loop closure. I needle felted that on to the cuff.
I also made a single bubble in a small piece of wet felting. I turned that into a brooch. I needle felted some yarn around the bubble and poked in the center and added a decorative button in the indention. All it needs now is a brooch pin attached to the back.

Monday, July 14, 2014

Wet Felted Cuffs


Cuffs Are Great Technique Practice
The last couple of days it's been 100 plus temperature. Not exactly good felting weather. But with free time I worked on these cuffs as practice doing a couple textural 3d techniques. The green one I embedded felted balls into the base then cut away the top layer to reveal them. The green base was free form felted.
The next cuff I felted over a resist. I made the first layer of one side teal colored. Then did the other layers brown. I lightly felted the piece and then made 3 vertical slits on one side to reveal the teal inside and cut open one end to remove the resist. I continued to felt and full the piece keeping the flaps the slits created from felting closed. I rolled it a bit trying to shrink the length but only the width seemed to shrink. So I threw it in the dryer. I still didn't shrink much more. I ended up cutting about an inch off one end. No harm done. I added some beads, not the best, but all I had. I cut a button hole and added a button closure. Also on the top layer I added a strip of white roving and two borders of teal boucle hand dyed yarn.


Saturday, July 12, 2014

Wet Felting Experiment


Experimental Wet Felting
Yesterday I did some experimental work. I wanted to felt around something 3d by wet felting, not needle felting. I wanted to make an abstract irregular shape. I tried to tie wool yarn around clumps of fiber fill in various areas. Then I covered that with wool roving, wet it down and started felting. The more I felted and the more it shrank, it turned into a ball about 5" across. I could not maintain the irregular shape. I need to figure a way to felt one area at a time I guess. Maybe it would work if I wrapped the fiber fill with silk fabric and tied in the shapes.
Anyway I ended up with this large ball/egg shape. So today I painted it with setasilk paint. I expected it to paint more solid but I think the fiber fill came more to the surface then I thought it would. So of course the paint did not adhere to the fiber fill only to the wool, giving it a very textural look. So now I call it my Thunder Egg. I had this felted stand I made for something else but it fit the egg perfectly. So much for experiments gone wrong!
If you wanted to make an egg filled with fiberfill and covered with felted wool roving it would be ideal for stitching and beading on.
Thunder Egg On Stand

Wednesday, July 9, 2014

Wet Felted Vessel with Shell Inclusions


Wet Felted Vessel with Seashell Inclusions
This vessel was wet felted using 3 layers of Natural Finn wool. Then I added the sea shells and next I placed some orange Merino wool over just the shells and placed some of the orange wool in thin strips flowing in and out and around the shells. I placed thin strips of thin plastics over the strips as a resist. Now I covered the orange strips with thin plastic strips as a resist and covered everything with one more layer of natural Finn wool.
I felted everything being careful to felt around and over the shells. Next I shrank and fulled the piece. I cut out the felt over the shells and made slits in the top layer of wool revealing the strips of orange wool and opening out the top layer edges. The shells are just on the front side but the strips continue around to the back side. I am trying to figure out a name for this one. Anyone have a suggestion?

"Untitled"

Tuesday, July 8, 2014

Flora Fountain Topper


Topper for Flora Fountain Vessel
Today I made an alternate topper for yesterday's vessel. I started out with a different plan but it shrank to small. So I decided to make the best of it not wanting to be wasteful. The black nob part that also goes down a couple of inches is the part that went wrong. I put a golf ball in it and fulled it to that shape and folded up from the bottom to make a thick edge around the bottom of the ball area. Next I felted a piece of the aqua colored wool in to an irregular square  shape. I cut a cross slit in the middle of this piece and slid the ball topper bottom thru the slit. That left 4 triangular tabs around the aqua area that I could needle felt to the black area. Now I was able to just gentle push the top into the top of the vessel forming another flange shape, repeating the flange on the vessel.

"Flora Fountain"

Sunday, July 6, 2014

"Flora Fountain" Felted Vessel


One Piece Vessel with Flange
My project the last two days was this vessel. My intent was to create a vessel with a flared flange around the circumference.  I created the flange then placed it around the vessel with the lower unfelted edge placed at the middle of the vessel. This was placed after the 2nd layer of wool was wet down. Then I put two more layers of white on the top of the vessel. Then flipped up the flange and placed 2 more black wool layers on the bottom half of the vessel, overlapping the flange fluff edge to incorporate  it into the side of the vessel. Then I carefully began felting and rubbing making sure the flange remained free from the vessel 2/3 of the way up. I blew up a balloon inside to felt  and shape the vessel.
I'm playing around with embellishments. I had this felted flower I had already made in complimentary colors. The flower is not attached at this point. It can be removed. I placed an antique frog that just happened to fit in the opening and added some rope pieces I had felted earlier. I also needle felted some white locks around the top edge
"Flora Fountain"

Saturday, June 21, 2014

Workshop


Pamela McGregor workshop

It's been awhile since my last post and I apologize. Life Happens. I was in Cabo for six weeks in Jan. and February. I painted while I was there but no felting. When I got home I had to do some new paintings for our annual Art Studio Trek and get my studio and house ready for that. It was a success and worth the work. I sold about half paintings and half fiber art. 

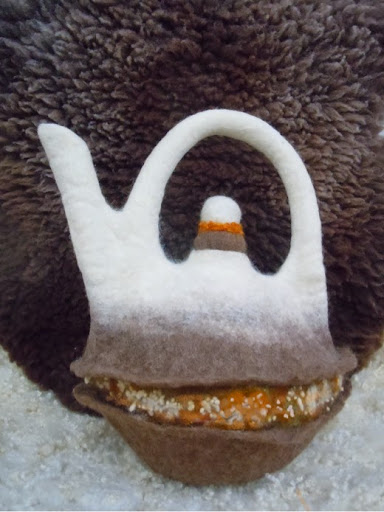
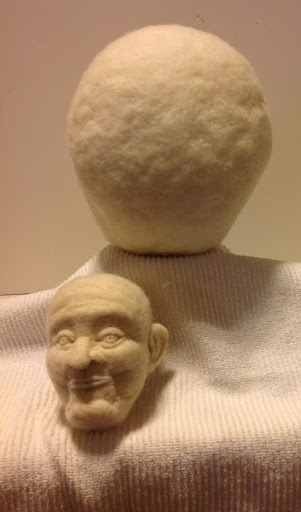
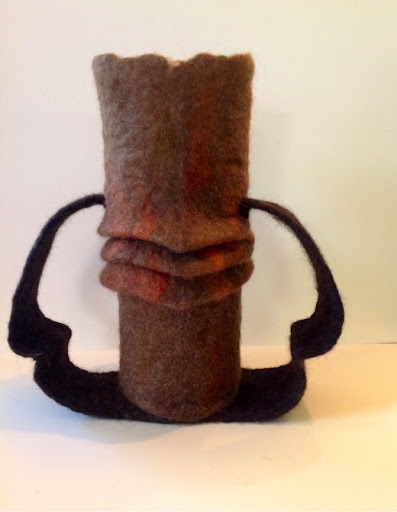
The end of May, first of June I went to Minnisota and attended a great felting workshop with Pamela McGregor. I learned how to make a wet
felted tea pot with a nice fitting lid. We learned a lot of surface techniques, how to make handles, a great wool to use for three dimensional felting and much more. Below is the teapot I made in the workshop.


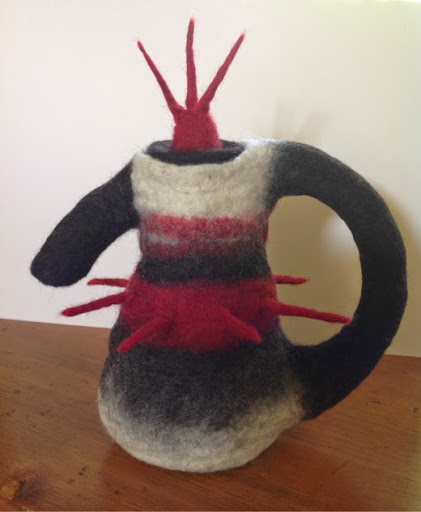
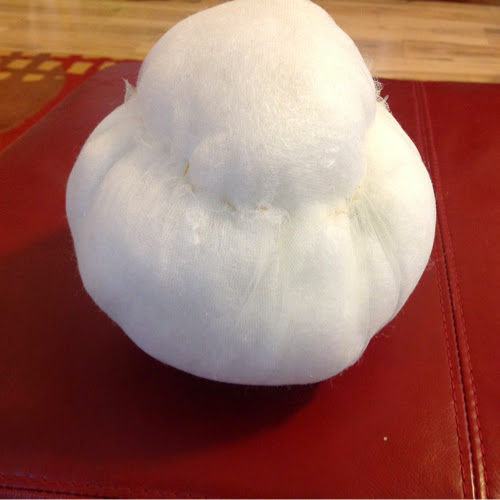
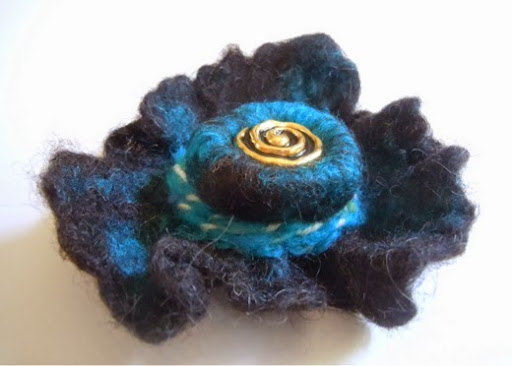
The teapots were made with Finn Wool. What a difference this wool makes when making vessels. It felts quickly and becomes very firm and rigid with no sagging. When I got back from the workshop I wanted to felt but only had Merino wool. I made the piece below but it is way to soft. I wanted to put the fold in it, which was fine but the rest kind of sags. I think I will wet it and throw it in the dryer and try to shrink it up even more to stiffen it.


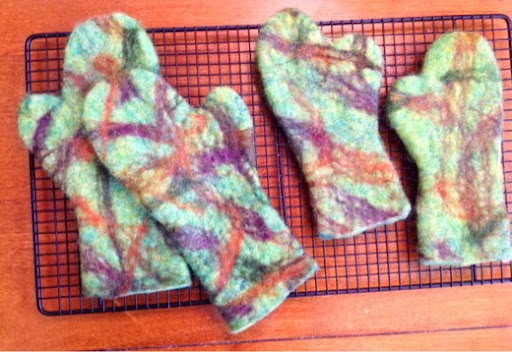
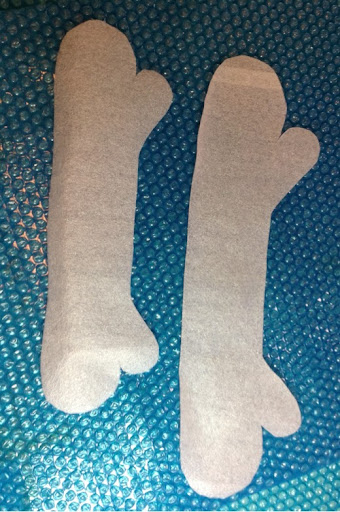
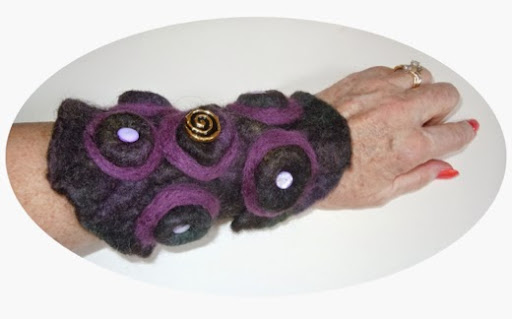
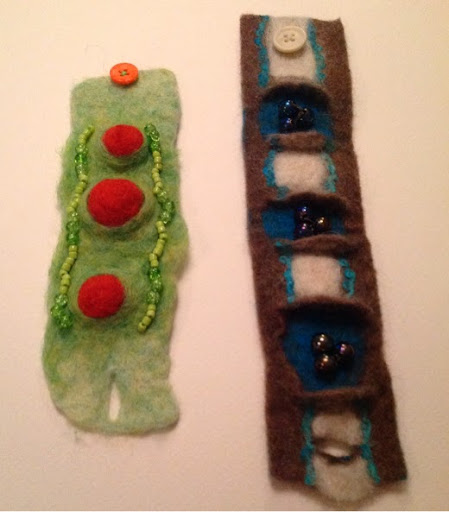
I wanted to practice felting bubbles and nodes so I felted a small sample and then decided to make a cuff out of it. I added a felted loop and a button closure.


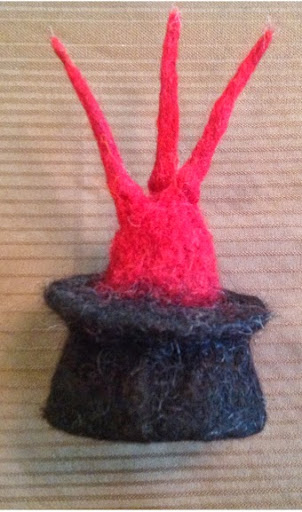
I finally received my order of Finn Wool and have been working on this teapot for a couple of days. Everything was going pretty good but when I made the topper it came out a bit too small for the opening. Not wanting to waste what I had done I figured out a way to make the hole smaller without too much trouble. I made a black felted cord long enough to fit inside the opening. I needle felted it on and now the lid fits perfectly.


The photo above shows the black cord needle felted to the inside top edge.


This is the topper that fits inside with a flat rim over the teapot edge.


Sunday, January 5, 2014

Mittens


Wet felted mittens for my Grandsons

Today I made some mittens for my grandsons who are age 2 1/2 and 8. The last time they spent the night with us I traced their hands and told them I would make them some mittens. So here they are.

They were done the same way as the slippers. I used their hand tracings and then added about 1 inch all the way around. I cut out the pattern and taped the arm ends together so each pair could be felted at the same time and then cut in half after felting. I cut the pattern out of floor underlayment to use as the resist.