Wednesday, September 25, 2013

Wet Felted Purse

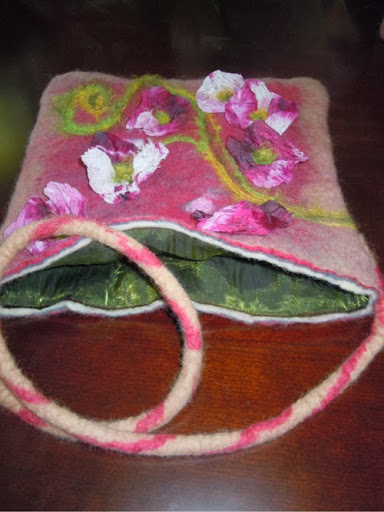
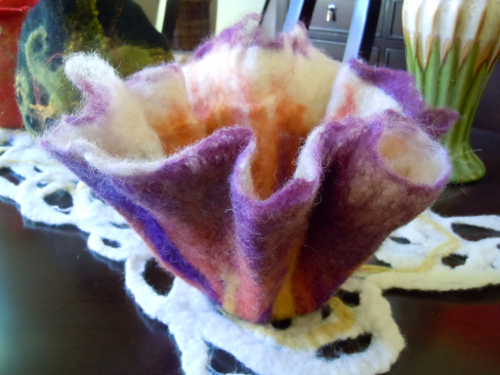
Now finished......What started out to be a square bowl but is now a purse.

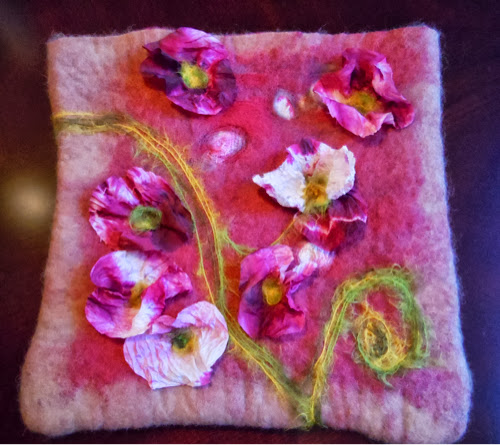
My square bowl project almost finished except for putting a magnetic closure on it. 


I made a rope strap by laying out a length of wool top a little longer then I needed. I tried something new by placing a length of cotton cording about 1/4 in thick on top of the wool. I lightly folded the wool over the cording and lightly tacked it with a needle felting needle. Then I wet it down with hot soapy water and lightly rolled it back and forth with the palms of my hands. Just very lightly at first then increase pressure a little at a time until it starts firming up. I left 3 or 4 inches of felted dry wool at each end. When the rope was very firm I finished the ends by wrapping some wool around the rope where the dry felt met the wet rope. Then wet that down and folded the dry felt in half meeting the bottom of the felt I just wrapped around. Now I wet that down and rubbed with finger to start felting. Then I used my sander to finish felting and flatten those ends to make a strong flat surface to stitch the handled onto the purse. Seams to make a nice strong handle attaching method. And using the cord in the rope uses less wool and is easier to roll without getting creases.


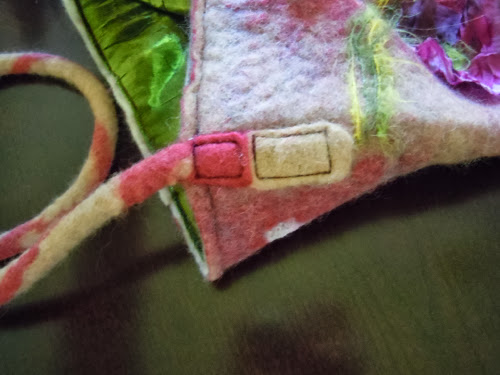
I forgot I also sewed a green lining and put that in before attaching the handle.


Tuesday, September 24, 2013

Not a Square Bowl

Not Exactly a Square Bowl

Well I was working on a square bowl using my wire mesh method of felting. Sometimes things don't go as planned. I used a coarser longer fiber wool and some batt wool and it was to thick and too long and it didn't felt through the wire. The first time I used the wire I used just Merino wool and it worked great.

After I felted the project I cut one edge open and removed the wire mesh. Now it can either be a bag or a pillow cover. I needle felted some dyed silk scraps and yarn onto the bag to make a floral embellishment. Latter I will make a felted strap to attach to it and make it a bag.  If your projects don't turn out as planned you can usually use the felted wool for another project. So don't give up....be creative!

I may add a little more detail in the way of more stem yarn needle felting. Then it needs a fabric lining. I will show a photo when it is completely finished.

I'm not giving up on the square bowl. Look forward to seeing it in the near future.


Wet felting Idea

Sketch Book Felting Idea For Next Project

I usually think of ideas for felting laying in bed before falling asleep. I have started using Bamboo sketch book on the ipad to jot down my rough ideas so I don't forget them by morning.

This is last nights thoughts. Make a square piece of felt with wire mesh encased in it. Create a nice design in the bottom either wet felted or needle felted after felting. Then fold and mold into a box and make some felted ball feet for it. Make it about 10x10. Look for the finished project in my next post.


Sunday, September 22, 2013

Felted Angelfish

Switched to 2d felting....Angelfish Wool Painting

To keep things fresh I switched to 2d felting. Working from a reference photo I layed out the background and wet felted it to make a prefelt (partially felted).  I let it dry then needle felted more details. Then I finished the felting and fulling process. I let it dry again and then free motion stitched even finer details.


Friday, September 20, 2013

Felted Vessel


Wet Felted Vessel With Craters

Today I thought I would try making craters on the sides of a vessel. I cut out a resist of plastic the shape I wanted and placed two layers of wool on each side. I then placed some gold wool in the areas I wanted to make the craters. Then I put plastic circles on top of that for a resist. Then I added the last two layer of wool covering the circles. The last layer was more decorative and I used a finer wool. I wet felted as usual and at the point where the big resist was removed I also located the circles by feel and cut a slit to remove them. I used my fingers to enlarge the hole and worked the edges of the hole to smooth and felt them. I then finished the felting process by fulling as usual. Then I shaped it and put a glass in it to help shape a flat bottom. Then set it aside to dry.


Wednesday, September 18, 2013

Today's Wet Felting Adventure


Todays Wet Felting Adventure

Today was a great day to experiment and try wet felting an idea I had sketched in my sketchbook on the iPad. I drew the shape and cut out a template for the resist. I intuitively chose colors as I went along. The first two layers I used off white wool batt. The next two layers were a striated wool roving made up of many colors that from a distance looks gray. The last layer I used some lime green roving, some off white from the batt, and some yellow pencil roving.
After all was said and done the finished vessel reminded me of the moss on the damp cliffs of the Oregon coast that I visited last summer.


This is the template I made with the first layer of wool layed on one side.


Tuesday, September 10, 2013

Summer Felting


Wet Felted Vessels 

This week has been great for working on my felting. Although the weather has been warmer than I would like it it to be I had a lot of free time while our Bathroom is being remodeled. I did the next two vessels using a flat resist. The red one has silk waste and white Angelina fiber that gives a hint of sparkle that may not show up in the photo. The black and green vessel has silk hankies and glass stones embedded.

To


The next two vessels are wet felted with aluminum window screen encased between the layers. As far as I can find no one is doing this technique. I am still working on perfecting the process. It makes it possible to felt a flat surface and then be able to bend and sculpt it in to many varied shapes including square boxes etc. I'm still working on the wire cut edges to eliminate the thin wires from popping through the felted edges. The main thing is to leave some felted edge beyond the wire. Don't trim felting close to wire edge.


Back Side
e