Saturday, December 6, 2014

Needle Felted Head....Stage 3


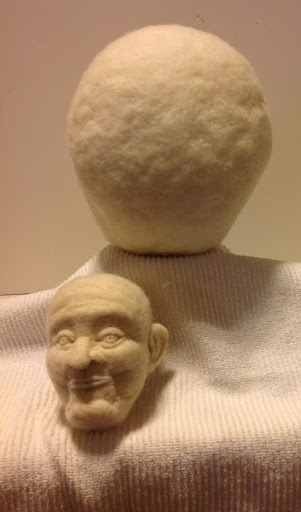
Life Size Needle Felted Head......stage 3
Now I am starting to refine the shape of the head. Flattening the sides and adding more wool to the chin....lengthening the face. Locating where the features will go and measuring and comparing to my model which is my husband. I have started with the nose.
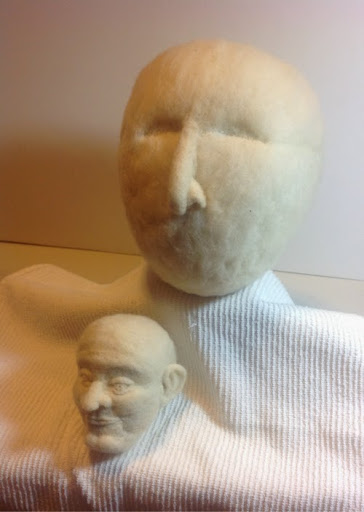
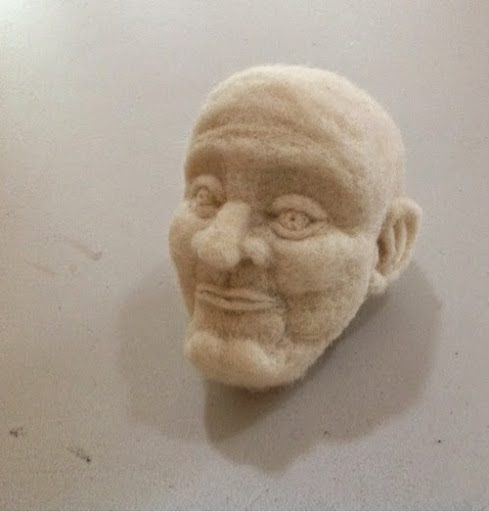
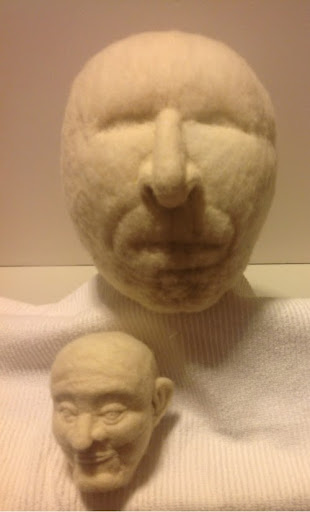
I added more width to the nose and reshaped the nostrils. Sculpting with wool is much like clay. You can add and subtract as you go. You can even use scissors and trim off unwanted wool and needle in new wool.

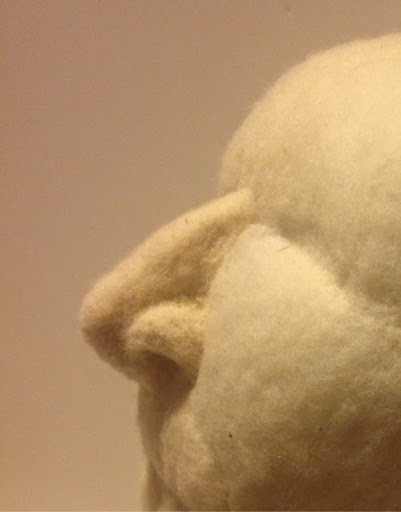
You have to be conscious of the profile as well since this is 3 dimensional.  Here I have checked the depth of the nose. I think it's pretty close to accurate.
Check back soon. I will probably move on to the eyes and brow line next.  And will probably be adding more wool to the forehead area.....still adding more length to the face.


Thursday, December 4, 2014

Stage 2....Felting a full size head


Life Size Needle Felted Head......stage 2
Now I have needle felted wool batting all over the poly batting  core shape. I am now working on forming the head and getting it to the shape and size it needs to be before moving on to the features. I will also be working on smoothing the surface. I may wet it with soap and water and use wet felting techniques to tighten and smooth the surface.
I included the face below for scale.  The top form is still slightly under full size.
......moving on to stage 3.


Life Size Head Demo....Stage 1


Life Size Needle Felted Head
Well here goes. The beginning stages of my first life size needle felted sculpted head. I decided to use poly batting for my base or core of the head. No use to waste good wool on the inside. I bundled up the poly batting in a ball and put netting around it and secured it with string. Then to form the back of the head I bundled up a smaller ball of batting placed on the first big ball and covered it with netting and hand stitched it together.
After bundling the first large ball I trimmed the netting off close to the tie.
As seen above I placed the smaller bundle of batting over the tie area of the big ball then covered it with netting and hand stitched it down around the edge roughly shaping it while I stitched.
Next I started needle felting wool around the stitched area to fill in and form a better head shape. Now I can continue with the needle felting process. Adding more wool and sculpting. Stay tune for more steps in the process.


Tuesday, December 2, 2014

Needle felted sculptures


Needle Felted Heads
This is my second character head using better skin tone wool and still using exaggerated features. I am progressing with my features being more prominent and defined and adding more detail.
This is my third head sculpture. Here I am moving toward a more realistic face. This is about 4.5x3.5 and the one above is about 3.5x2.5. My goal is to be able to do a life size head once I get comfortable sculpting with a needle.  These faces are just made up from my mind. I hope to be able to sculpt a person I know eventually.

This is still a work in progress. he only has one ear and still needs some refining and detail.